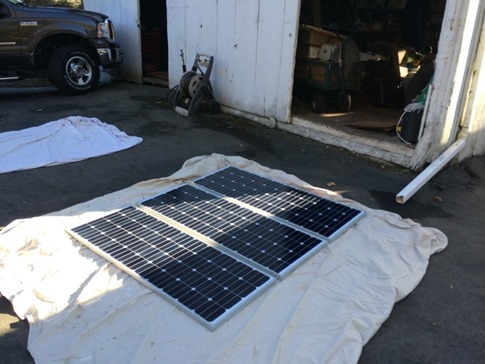
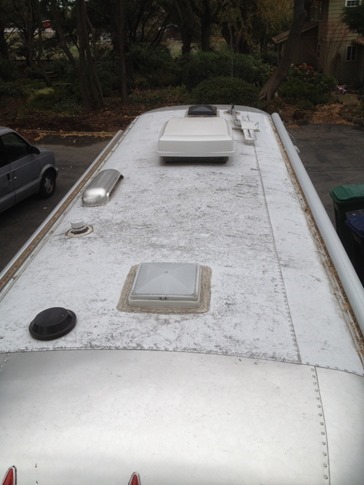
Now with everything out of the way on the inside of the trailer, I could start doing what I was really looking forward to: laying out the solar panels on the roof. Since it was already out from pruning the fruit trees the week before, I grabbed my orchard ladder and set it up beside the trailer, happy to find it was a perfect fit with a wide base that slid under the Airstream’s “hips” and a narrow top that got me as close as possible to the sloping roof. I unpacked the first of the panels and, gripping by the frame in my outside hand, sidestepped my way up the ladder. Spotting a line of rivets running across the roofline that indicated a sturdy rib beneath the thin aluminum roof, I delicately shifted my weight off the ladder, over the street side awning and the drip rail above it and onto the tight rope of rivets. Straining to swing the heavy panel over the refrigerator vent as the thin edge of the frame dug into my fingers, I carefully lowered the panel down onto the filthy roof and knew I’d skipped a step.
As I’ve gotten older and put a few more projects under my belt, I’ve realized the importance of trying to do things the right way. Planning ahead. Taking a second to think before doing. Using the right tool for the job. And I’d promised myself I would do all these things on this project. (Keep reading, that statement’s only likely to get funnier over the coming weeks…) I knew at this point that no matter how much I wanted to see those panels all lined up and shining in the sun, I needed to reverse my precision rooftop dance, return the panel to its protective cardboard box and give the roof a good cleaning before proceeding.
An interesting note: The ribs of the Airstream’s body are spaced such that when attempting to have one knee on one rib and the other knee on the next adjacent rib, the average male will feel a searing pain in his crotch possibly accompanied by a tearing sound. With any luck, the sound will be coming from the fabric of his pants.
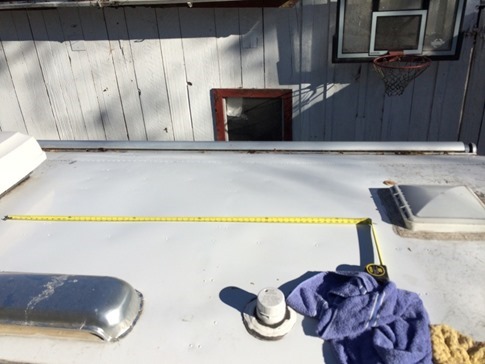
Following some awkwardly intimate positions on the roof with a sponge and a towel, I climbed back up to confirm my measurements (but did not feel comfortable making eye contact). With about 72” to work with between the AC cover and the rear vent, the three 21” panels would have to be mounted pretty close together, especially once I installed the new Fantastic Fan Ultra Breeze vent cover. In fact, I was also planning on replacing the manual rear vent with a new Fantastic Fan with a thermostat and reverse function, and once the panels were in place, there wasn’t going to be a lotta room to work. Ugh, what did I promise myself again? Okay, do the fan before the solar…
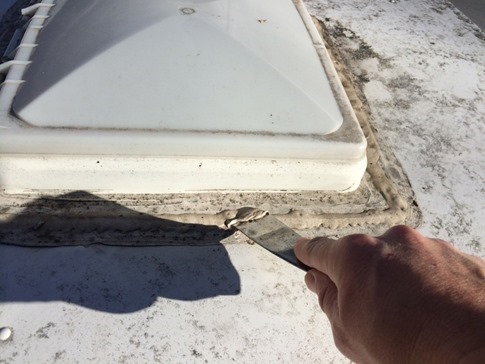
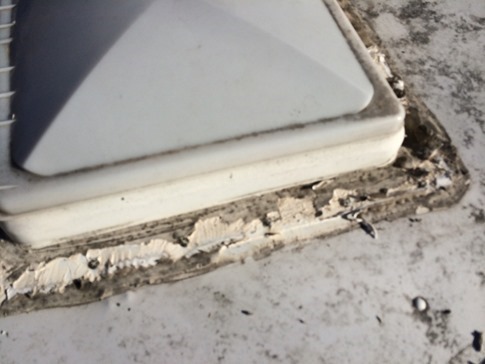
The prime time to remove a rooftop vent is 1 hour and 27 minutes before dusk; That way, the adhesive will have been warmed by the afternoon sun, but you won’t be baked by the reflection from the white roof. I got started at high noon. In jeans and a black shirt. What’d I say about planning, taking a second to think and using the right tools? But in my favor, at that hour, the adhesive was pretty easy to dig into with a sharpened putty knife.
I worked around the exterior of the vent, trying to balance my weight between two ribs (see note about rib spacing above), locating the heads of the screws. Then I took a blurry picture of the exposed heads.
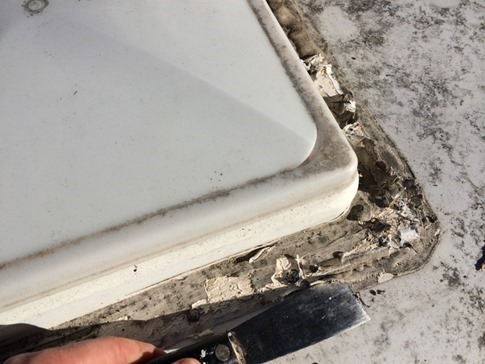
With most of the goop cleared, I could back the screws out with a cordless screwdriver. Note that you don’t have to remove all the adhesive, just enough to access the screw heads and then working around the edges where the fan trim meets the roof. Again, a sharp putty knife riding along the edge of the trim did the job.
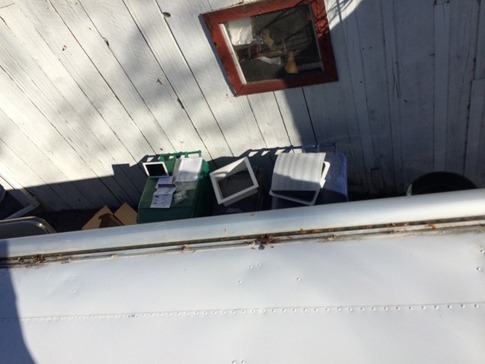
And don’t worry, I could *totally* see Wynne on the baby monitor app running on the iPad sitting on top of the green waste container from the roof and would know immediately when she woke up from her nap.
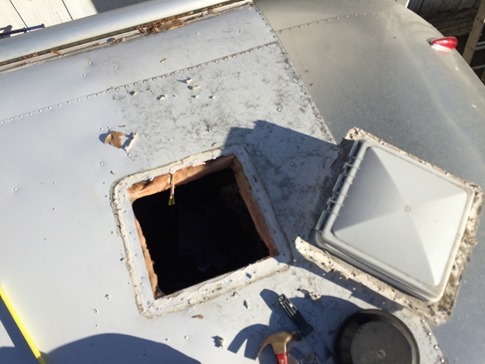
Okay, releasing the vent from the adhesive underneath the trim took a little more brute force. With the putty knife jammed under the trim at a 45 degree angle, I tapped the end with a hammer as it moved around the rim with the handle preventing it from penetrating too far. Once all the way around, it was free!
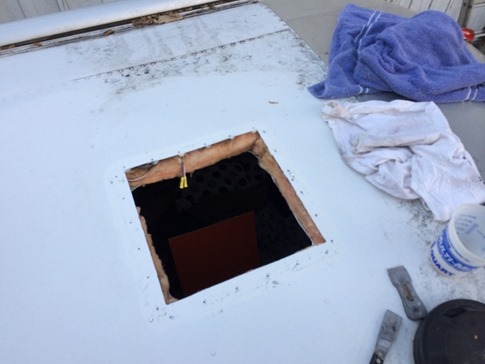
And the best part? Right along the edge was the pre-wiring for the fan, an option the original owner hadn’t… well… opted for. I had feared I would have to fish a power source over from a light or the bathroom fan or who knows where. From here on out, this was going to be cake! (cue knowing chuckles) I scraped away the rest of the sealant, hitting the last little bits with some acetone that seemed to soften them up and was left with a clean hole.
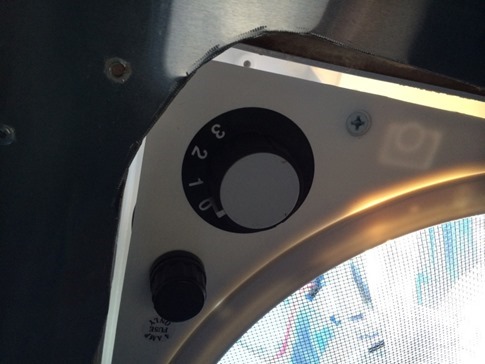
I couldn’t wait to test things out, so I grabbed the new fan, poked the leads into the butt connectors of the pre-wiring and twisted the speed control to level 1. Nothing. Huh. Oh duh, I need to raise the vent cover for it to turn on. Still nothing. Oh, I need to select IN or OUT on the fan direction switch. Nope, that wasn’t it. Oh, the thermostat. I put it all the way to the blue so it would definitely turn on. Nothing. Hmmm.
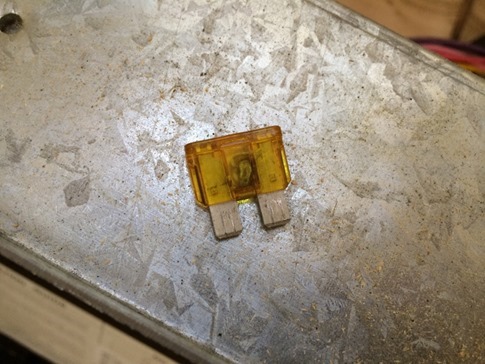
I climbed down the ladder and went inside. Maybe a fuse? I checked the wiring diagram the previous owner had left in an Airstream-branded cordura bag in the storage behind the lounge and confirmed that the purple wire I was working with was connected to the first circuit of the fuse box. I grabbed the large 20 amp blade fuse with the tip of my pliers and rocked it back and forth until it came out. It was in good shape, something I could have guessed based on the fact that the bedroom lights on the same circuit were working fine.
I decided to make sure I was getting a good connection from the fan to the wires, so I grabbed my nippers to clip off the butt connectors and strip some fresh wire. But, being the skilled and savvy person that I am when it comes to working with electricity, I knew I had to shut off power first. Of how to do that, I was not exactly sure other than unplugging shore power and clicking the battery disconnect by the door, but since it was now a couple hours after sunset, I didn’t want to be left completely in the dark. I reasoned that if I pulled the fuse again, I’d be safe. Now, where’d I put those pliers…
When I regained consciousness, the air inside the trailer hung thick with the scent of singed eyebrows. Actually, it wasn’t that bad, but I did manage to touch something I shouldn’t have with the nose of the pliers and got a good spark. Okay, that was dumb. I grabbed a flashlight, unplugged shore power and clicked the battery disconnect. With the prewire leads stripped, I could be sure I had a good connection and turned power back on. Nothing. Craaaaaaap! I had to accept failure for the night and went to bed.
Sometime in the night, the answer hit me. Could that be it? Could it have happened in just that order? The next afternoon, I turned the power back off and checked the fuse. Yup, while it’d been fine the first time I checked it, the second time I’d gone for it, the spark had blown it. As I’d guessed, the connection hadn’t worked the first time because the wire inside the butt connectors of the prewire hadn’t been stripped, perhaps Airstream’s way of safely terminating those wires in the ceiling. Once I replaced the fuse with a spare, stripped and reconnected the prewire to the fan, opened the vent cover, set the fan speed to 1, selected the IN direction and turned the thermostat all the way to cold, the fan clicked on!
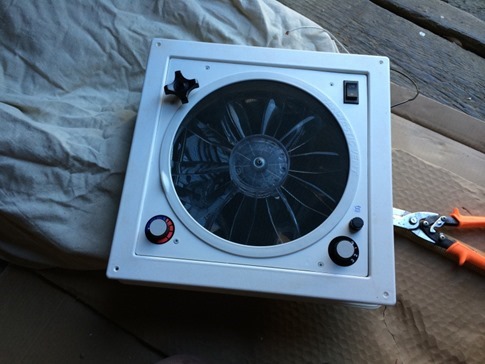
But I wasn’t done. Dry fitting the fan, I found that the skin on the interior needed to be trimmed for the “garnish” to fit. Yep, that’s what Fantastic Fan calls its interior trim. The garnish. Fortunately, I had a good pair of tin snips and made my way around, widening the hole from the inside.
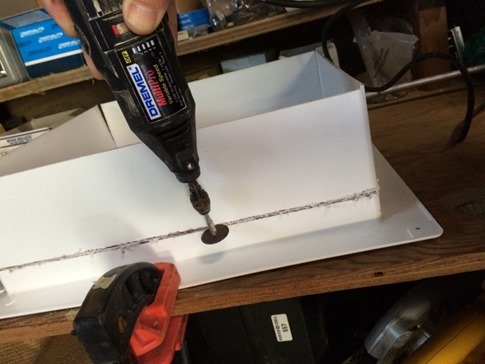
The garnish also needed to be trimmed quite a bit for the 1 1/2” or so thickness of the Airstream roof. I guess other trailers have much thicker roofs ‘cause the was close to 5 or 6” of extra height. I traced a line onto the flange and went at it with a cut-off wheel on the Dremel.
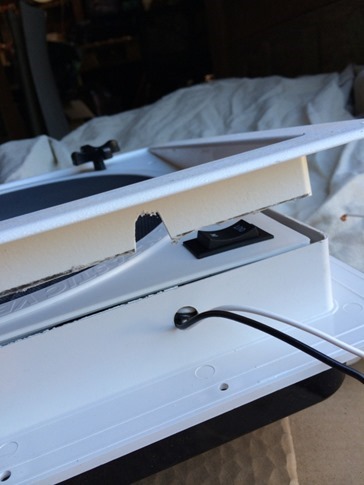
Though it was not mentioned in the instructions, I also had to make a little notch for the wires coming out of the side of the fan.
Now I was ready to install!
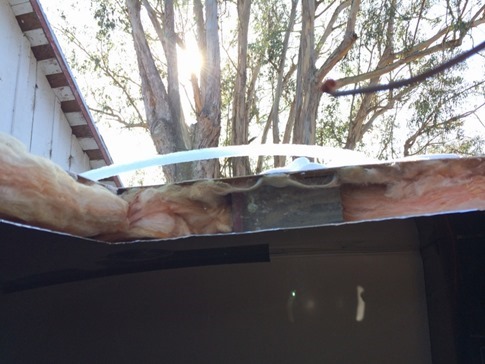
With Ann down below and me on the roof, we routed the wires along the side of the fan, making sure that the vent would open towards the back of the trailer. I also stuck a small block of pressure treated wood between the interior and exterior skins towards the back of the trailer. This spot on the roof is just about flat, but it’s location about half way between two ribs can cause it to sag a little under the weight of the fan, creating the potential for pooling water. The block lifted the exterior skin up just enough to create a slope towards the back.
And yes, before I connected the wiring permanently, I did remember to run them through the square closed cell foam gasket Fantastic Fan includes. I also put a dab of Dicor sealant in each of the old holes left by the original fan and pressed the gasket and fan down on top of them. Starting with the corners, I put a dab of Dicor in each hole and drove a screw down through it until I could hear the crackle of the gasket compressing. I did the same for the holes along the front and back and the middle ones on each side, leaving the two holes on either side that would accept the brackets for the Ultrabreeze Vent Cover.
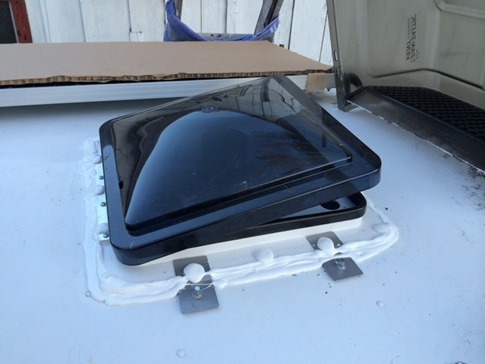
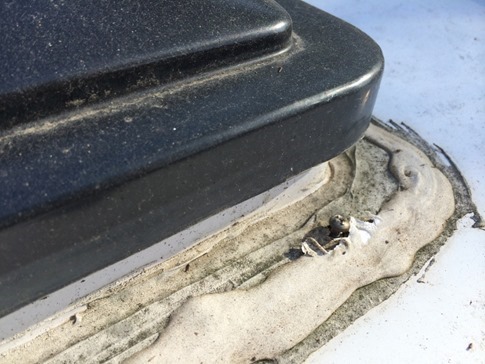
I ran a bead of sealant along the base of the fan lip all the way around and followed with another just above it on the edge of the lip. I don’t know if it was a little cold while I was working, but the Dicor Self-Leveling Sealant… uh… didn’t. Self level that is. It set up just like any other caulk for me. So, despite best intentions of a smooth, sloping seal, I ended up with what you see below. Once I added the vent cover brackets and went back over all the screw heads, it seems like it’s gonna work just fine, just maybe not the prettiest.
Update 2/4/2014 – The tube of Dicor I used to seal the feet of the solar panels leveled *much* better, so I scraped this gunk off the fan and recoated with the new stuff. Still not the best, but looks a lot better to me.
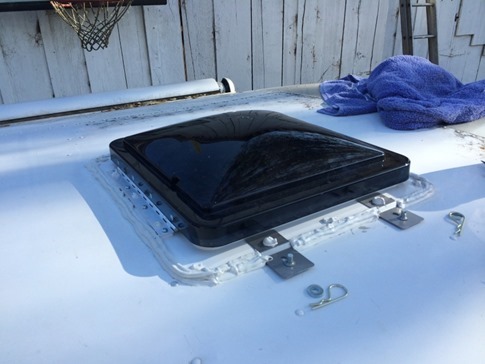
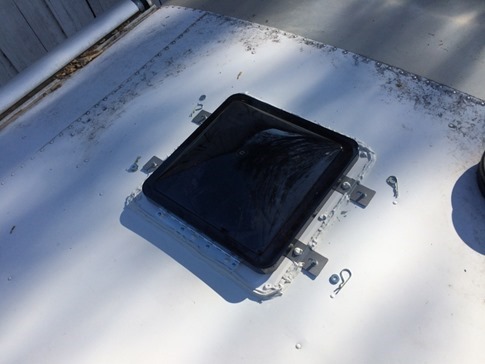
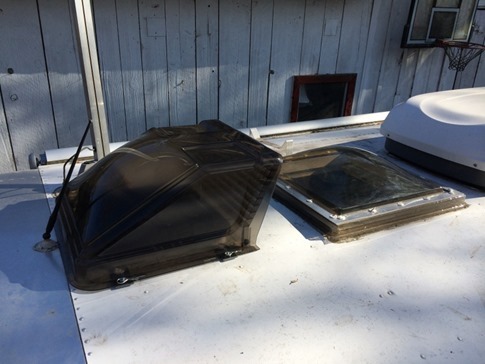
While the rear fan dried, I installed the Fantastic Fan Ultra Breeze Vent Cover on the front. It was pretty easy to see the bugle of the screw heads under the existing sealant which had, in fact, self-leveled. I dug the heads free of the second screws from each end and removed them.
With a dab of sealant in the holes and the brackets put over the top, I drove the included screws back down into the existing holes and covered the new screws with a glob of sealant. The vent cover slips over pegs in the brackets and is secured with clevis pins.
Not everyone loves the look of these vent covers on the otherwise streamlined roofs of an Airstream, but we figure that’s pretty much gone with big AC unit anyway, and you can’t argue with the function. On our 19’, the fog on the Oregon coast would wreak havoc on the moisture sensors of our fans, opening them an closing them sporadically. Other times, we’ve had sprinkles of rain on a warm night only to find ourselves stuffy in a warm trailer after they’ve automatically closed. With the new vent covers and the awnings on both sides and back, we’ll be able to pretty much open any window or vent no matter what the weather. And most importantly, now I could *really* start work on the solar install…

