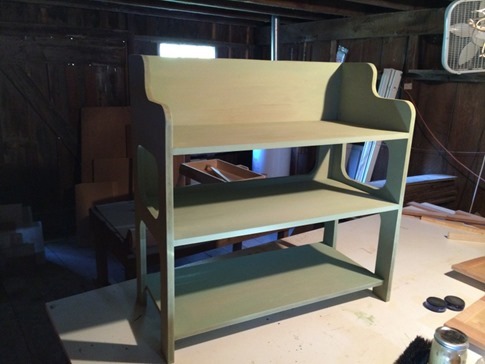
In the last post about our cork countertops, I mentioned getting distracted with a few bathroom projects while waiting for the finish to dry. Just the other day, I was fondly remembering the first 9 months after we moved to the Farmlet when Ann was pregnant with our first child but we still had uninterrupted day after day to put up fences, build planter boxes, build the chicken coop, fix the greenhouse and run irrigation. Now we plan around early morning wake ups, nap times and snack schedules. Anything else we can get done just seems like gravy.
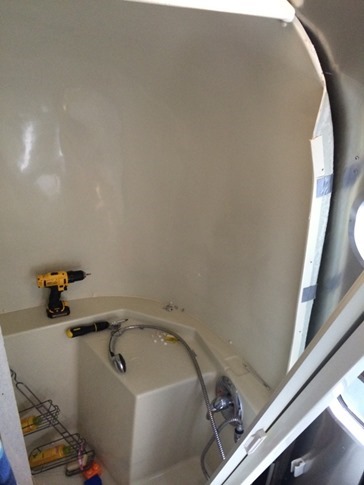
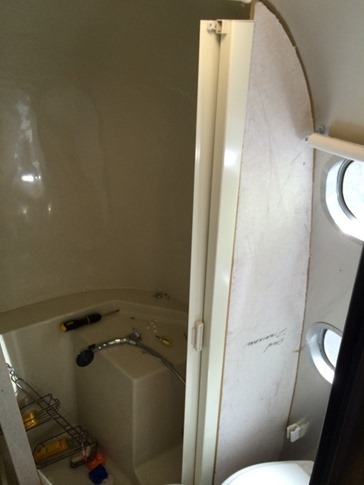
While this has already been a long (and rewarding!) project, with another baby on the way, time’s only going to get more scarce, so I figure might as well get as much done now as I can. Which brings us to the retracting shower door that had come unstuck from the side panel of the shower: While investigating, I discovered a little water damage to the bottom of the panel itself. Before, I could stop myself, I’d pulled the panel and launched a plan to replace it with frosted acrylic that would let more light into the shower and not be susceptible to water damage in the future.
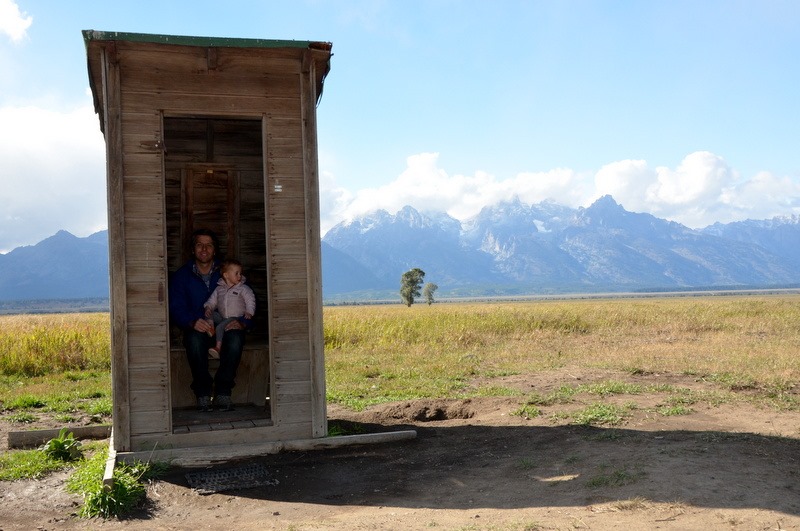
We’d already applied a frosted film to the lower bathroom window (there are two oval shaped windows, one above the other) so we didn’t have to keep the shade closed, but after a couple instances of “awkward eye contact” through the upper window while on our shakedown trips, decided to reinstall the shade for camping in more populated areas while retaining the “outhouse view” effect while boondocking. Why is it that the beauty of the landscape somehow seems magnified when observed while “in the act?”
From Mormon Row near Moulton Barn in the Grand Tetons (blog post)…
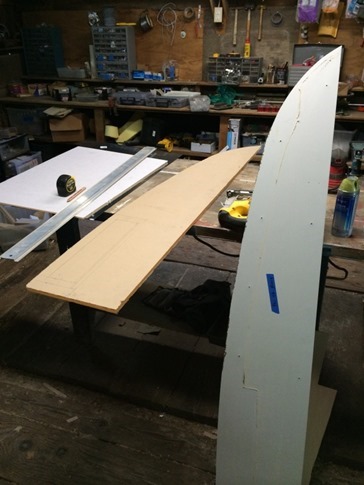
Using the original panel as a template, the guys at Tap Plastics had the new 1/2” frosted acrylic replacement cut in no time. Honestly, it wasn’t cheap ($125 as I recall) because of the thickness of the material which I needed to fit the trim and to have something for the door to stick to, but I think it’ll be worth it in aesthetics and durability.
Testing the fit of the new panel with its protective paper still on it.
While I had the panel off, I noticed that all the shower plumbing was tucked in behind this part of the fiberglass shower enclosure. Remembering that our Canada Caravan buddies Deke and Tiffani from Weaselmouth had had problems after a leak in their shower, I decided to cut an access door so we could easily check for moisture and fix a problem if needed. Why Airstream doesn’t do this I can’t tell you…
With the access door cut (I’ll add a removable cover later), I realized a problem; Part of the point of the wooden panel was to block the messiness behind the fiberglass shower enclosure. Solution? Make part of my semi-opaque frosted panel… well… “full-opaque” with some carefully applied white paint on the back side of the panel.
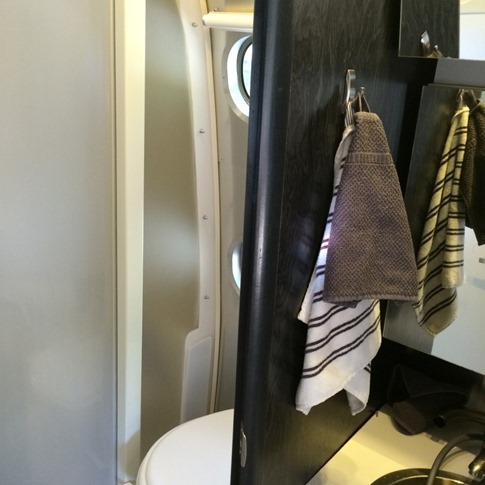
You all have no idea what I’m describing here do you? No problem, here’s the final panel in place. The paint at the right edge where you can see the cap nuts covers the unsightly enclosure edge and the white panel to the right of the toilet is the access door to the plumbing. All that was left was to get into that shower and whip my caulk out. (sorry, #twelveyearoldsenseofhumor)
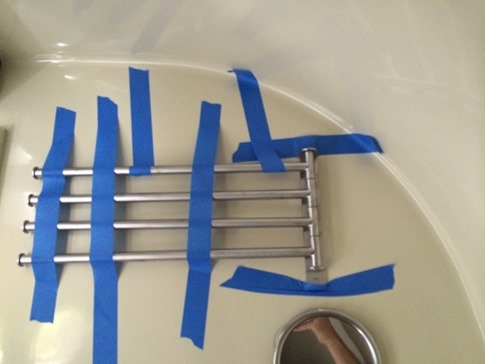
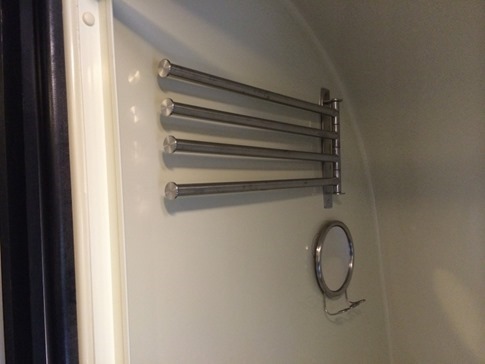
While I was in there, I also hung a no-fog shaving mirror and a swing out towel rack, both secured to the fiberglass with silicone Liquid Nails and held to dry with blue tape. I’ve never had something installed this way fall off and but a razor blade and some mineral spirits will cleanly remove it if we change our minds.
We have hooks on the back of the bathroom door to hold our towels while we’re in the shower, otherwise, they’ll hang on these bars to make more room in our tiny, triangular bathroom.
I also moved the hook for the handheld faucet to higher up the curved wall, practically on the ceiling, so it could be used like a normal fixed shower head if we wanted. Again, a dab of Liquid Nails held it securely in place and I added a couple clips to keep the hose out of the way. Pics in the final reveal post.
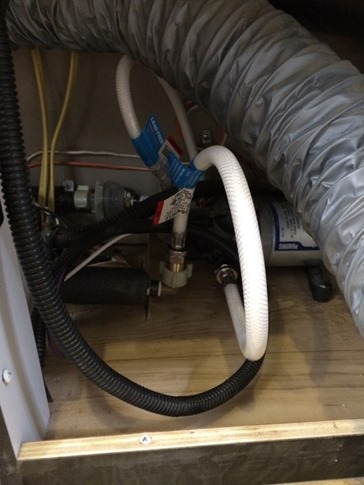
While testing all the plumbing connections after putting the bathroom back together, I remembered yet another thing I’d been meaning to take a look at: the water pump that sounded like it was going to rattle the trailer apart when it ran. Searches on the Airforums had yielded suggestions of adding a loop of flexible hose on both the intake and output and cushioning the mounts with rubber feet (or even a mousepad). After implementing both of those fixes, the results were… eh, kinda maybe a little better, maybe? I also wrapped some pipe insulation around the pipes leading to and from the pump to keep them from rattling with little or no benefit. In the end, I reasoned that I was dealing with a 9 year old pump and opted to replace it with one that Shurflo was touting as the “next generation.” The SHURflo 4008 Revolution had a slightly higher flow rate (3 gallons per minute vs 2.8) and did turn out to be much quieter than the old pump. In the end, we’re happy with the results but will really need to compare it with someone else’s trailer to be sure how much better (if at all!) it is. At the very least, I have confidence in the new pump and have familiarized myself with another system in the trailer.
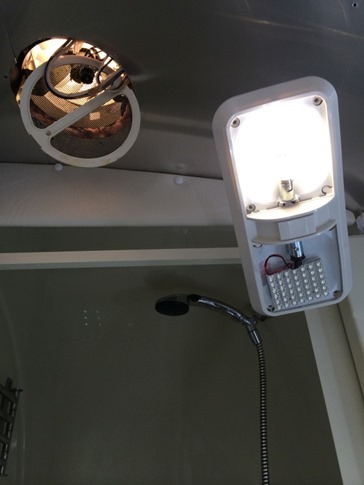
There was one more thing I really wanted to do in the bathroom. Our 19’ had had a separate switch for the lights in the vanity area (which on our floorplan is in a little nook in the bedroom) and the toilet area, allowing for late night bathroom trips without blinding everyone. I was surprised to find them both on the same switch in the 25’ but stumbled on a solution from another 25’ CCD owner. I unscrewed the overhead light in the bathroom and pulled the interior trim of the fan. Fishing my fingers around in the insulation between the inner and outer skins around the fan hole, the first wire I found ran to the light. I nipped the wire, capped the end that ran back to the switch and used butt connectors to splice the light into the fan circuit. Now, like the fan, you just reach up to turn on the light without waking the family. Seems small, but this is a huge improvement in the way we use the trailer.
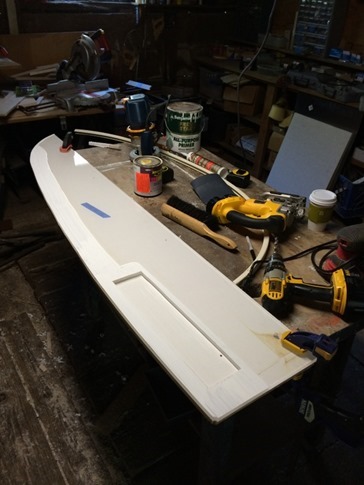
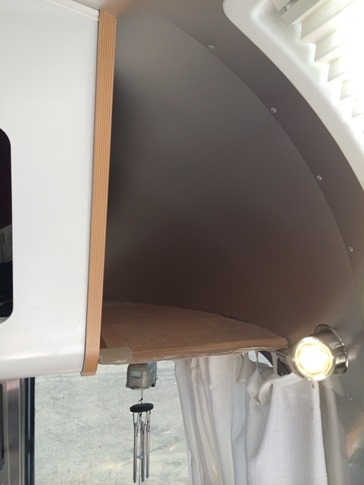
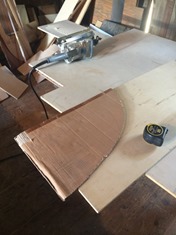
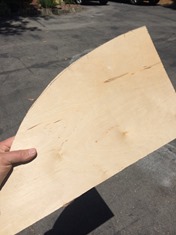
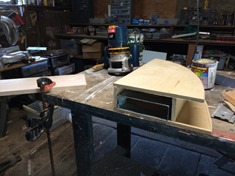
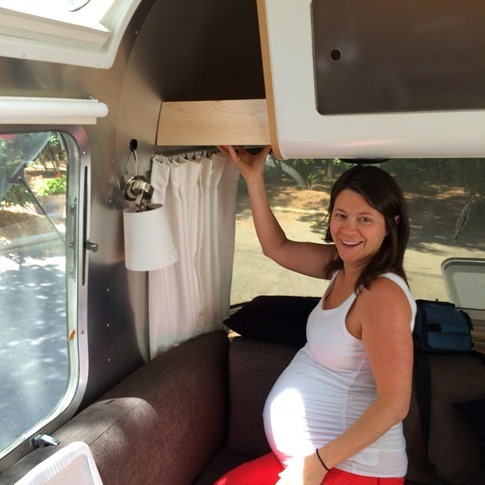
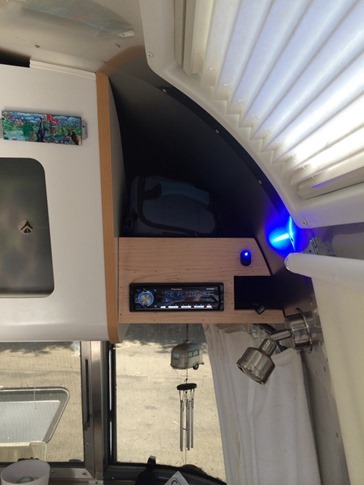
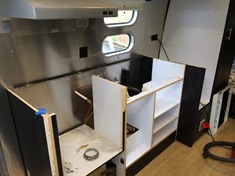
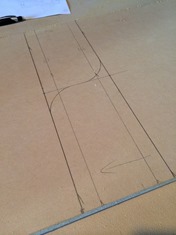
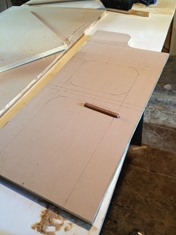
Meanwhile, towards the front of the trailer, the plan was to add two “wings” to the cabinet over the lounge since our year (2005) seems to be the only year in which the cabinets don’t extend wall to wall on the CCD models (normally, it’s one long white cabinet all the way across). The right side would hold the stereo and have a shelf for our camera bag and Ann’s purse and the left side would be a bookshelf. More templating with cardboard…
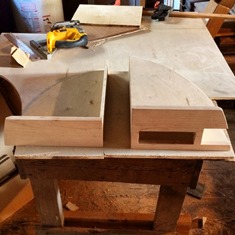
Fortunately, these pieces were the same (just flipped) for the other side.
Fitting the stereo mounting sleeve into its compartment and the wings ready for finishing.
Do I technically need to pay her time and a half considering her… situation?
People have asked about our “sconces” before. They’re just cheap IKEA lampshades attached to our reading lights with rubber bands. With the LED bulbs in the fixtures, there’s no problem with heat.
You may remember that the switch with the blue light is a subwoofer cut off to prevent a cycling hum while running on inverter power and to save battery life when boondocking. Or you may not remember, but… well, that’s what it is. There was also room for a little charging nook to the right with a USB cable coming off the back of the stereo.
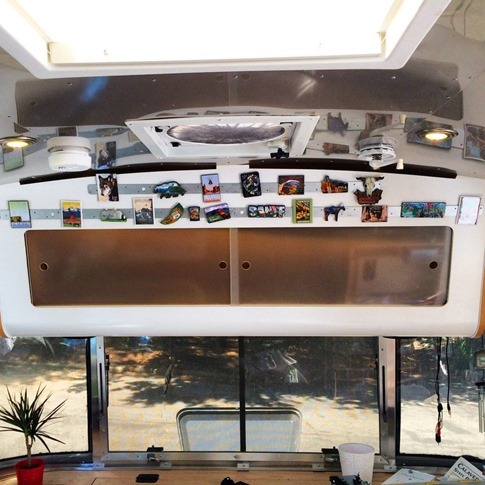
You can also catch a glimpse of the corner of another little finishing touch project, a new spot for the magnet collection to make more room on the chalkboard front of the fridge. At first, we tried a magnetic tape from the craft store, but the magnets barely stuck, much like our results when first trying magnetic paint on the fridge front. In the end, the solution was the same in both cases; Use metal. We used a galvanized metal sheet for the fridge front and used thin Simpson Strong Tie straps secured with 3M tape to hold the magnets over the lounge. We’ll let ya know how well they stay while rattling down the road, but we’d never had a problem on the fridge.
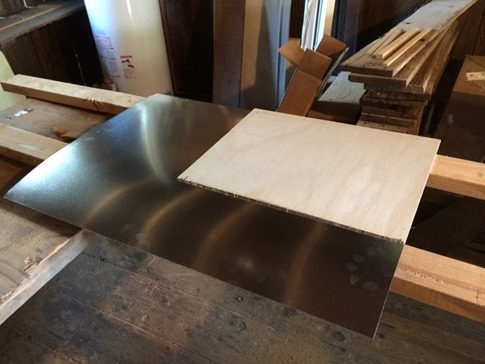
The pic below is of cutting a new sheet of metal for the upper freezer portion of the fridge. Note, you find this sheet metal near the ducting in one of the big home stores, not the stuff in the “hobby metal” area that’s thicker (and heavier) than you need. Here’s the link to it at Lowe’s. Should only be $10 or so.
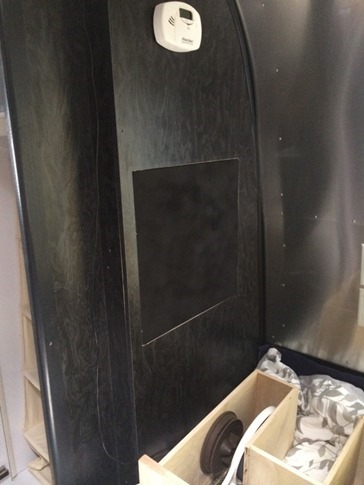
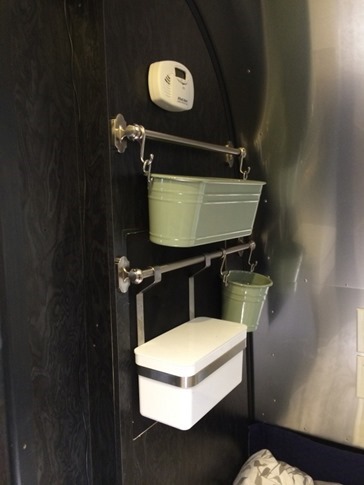
Of course, part of the motivation for upgrading to the 25’ from our 19’ was plans for a growing family, and if I haven’t mentioned it in the last 100 words, we’re expecting baby #2 just about any day! We used some IKEA wall mounted bins and pails in the 19’ for a makeshift diaper changing station and were able to modify the setup to work on the bedroom wall of the 25’. We removed the heavy steel TV/laptop foldout (not sure how either of those devices would work on this) and stuck a piece of hastily spray painted plywood in its place to save some weight.
The top green pail is for quick-grab clean diapers, bottom small green is powder and wet wipes and the white bin is for “soiled.” This bin seals tightly and does a surprisingly good job of isolating odor, though being forced to empty it after a couple days because of its size helps with that as well. Plus, IKEA also has a stainless one! We usually hang a towel off the bars and lay it down on the bed for a changing surface.
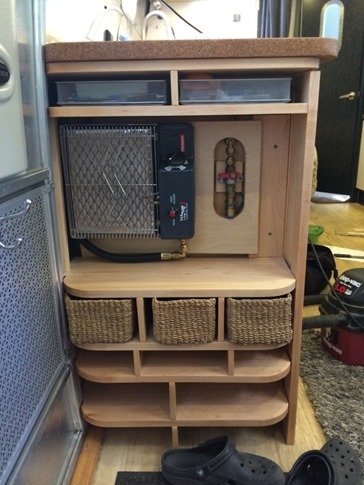
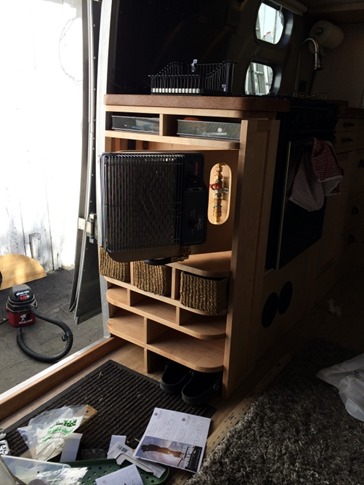
Next, I finally got the catalytic heater installed on the swing out mount in the new shoe storage cabinet. Not much to it other than a couple 90 degree elbows for the gas connection. The hose terminates at a quick release with a shutoff backing it up to prevent little hands from causing problems. Our Wave 3 catalytic heater might be a little small to count on to heat the whole trailer but will be a nice “fireplace” while sitting on the lounge or at the dinette and provides an option for warmth when conserving battery power.
When we downsized to an SUV from our F250 a few weeks ago, it meant we’d have less room for storage inside our tow vehicle, and two of the largest things we wanted to bring with us were a generator and our bikes. We’d never used a generator before but one had been included with our new trailer, and we figured it might come in handy if we ran into a stretch of cloudy days. When we mentioned our plans to sell the portable 120W Zamp solar panel to some full-timing Airstream friends, they suggested keeping the panel for improved collection on short/cloudy days and leaving the generator at home.
Based on our solar planning and our first weekend out, we should currently have about 3 days of battery capacity (with a little conservation and without any charging) before running our two 260 amp hour Trojan 6V batteries below 50%. With 405W (tiltable) on the roof and another 120W on the portable that we can optimally position and/or adjust throughout the day, we could be back full in about 2 hrs (+/- 23 amps from the roof and 7 from the portable) of full sun after one dark day, 4 hours after two days and 6 after three. Compare that to needing to run the 2000W Honda eu2000i (15 amps output) for 4 hours each day, 8 hours every other or 12 hours every three. Even in a shady campsite, if we could position the portable panel in a sunny spot, we could fill up over the course of a day or at least pull in enough each day to extend another couple days. For now, I think we’ll give the no-generator approach a try and of course, we could also expand our battery capacity down the road.
UPDATE 11/6/2014: Since writing the above, I’ve learned that my logic was based on some false assumptions. In fact, after talking to someone at Magnum Energy, I’ve learned that our MMS 1012 inverter/charger takes about 9 amps of the 15 amps @ 120V the generator puts out and converts them to 50 amps of DC charging. I’d actually been confused when hooking up to a friend’s Honda eu2000i when the IPN-ProRemote was showing I was netting something like 38 amps. Now it makes sense, not that I’m quite clear on the math of converting from AC to DC amps. So, in reality, we’d only need to run a generator about 1 hour a day to make up for our average usage.
To make it a little more convenient to use the portable panel, I installed a quick-connect plug into the extended battery box compartment. While the current from this panel will not appear in the BlueSky charge controller remote display, it has its own built-in charge controller so can be connected directly to the batteries.
ANOTHER UPDATE 11/6/2014: On our first few trips with this trailer, we actually ended up relying pretty heavily on the portable panel since our rooftop panels were often in the shade. That being said, we still found ourselves over 100 amp hours down according to the IPN-ProRemote after a few days. Even more interesting, the same monitor would still show 12.5 or higher volts and the 10 amp charge controller on the panel would indicate that the batteries were full. While I understood that the input from the portable panel would not appear as positive amps in the IPN-ProRemote, what I didn’t realize was that it also wouldn’t be factored into the amp hours down and battery percentage readings. I had assumed that these numbers were somehow determined through a real-time measurement on the battery. In fact, they are just records of the number of amps in/out that the IPN-ProRemote has read, and as such, do not include amps from the portable panel. Thus, when the IPN-ProRemote reads 100 amp hours down but shows a full battery charge of 12.5 V or so, it means that the portable panel has actually collected those 100 amp hours directly into the battery, bypassing the counter. Confusing when you’re trying to figure out if you can hang out another night at that awesome boondocking spot. After talking to Zamp, Magnum, and BlueSky, I think that if I rewire the quick connect for the portable panel (below) through the shunt that the remote panel reads from, everything should be picked up by the IPN-ProRemote and readings should again be accurate.
I also find myself tempted to use this connection as a power outlet as well. Seems like I could splice a connector onto some LED rope lights or a porch light for under the awning.
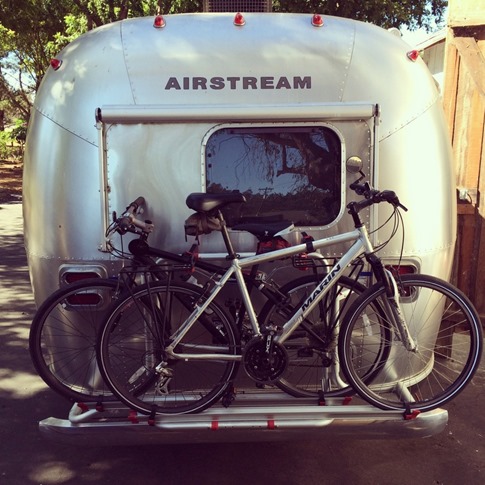
We had carried the bikes on the roof of our previous SUV but always found it to be a pain to get them down for a quick spin to check on laundry in the campground or to ride into town. After researching all the options including a front mounted hitch on the tow vehicle and some neat racks that mount above the propane tanks, we decided to drop the cash on the new Fiamma bike rack specifically made for (and endorsed by) Airstream. Unlike other rear mounted bike racks which can cause separation between the frame and body as the load bounces up and down, the Fiamma has rigid arms that bolt into the vertical ribs of the body at the rear of the trailer preventing any movement. Plus, our floorplan has only a small window in the back meaning that we wouldn’t be blocking any view like that in a FB (front bedroom) model with the dining/lounge area in the back.
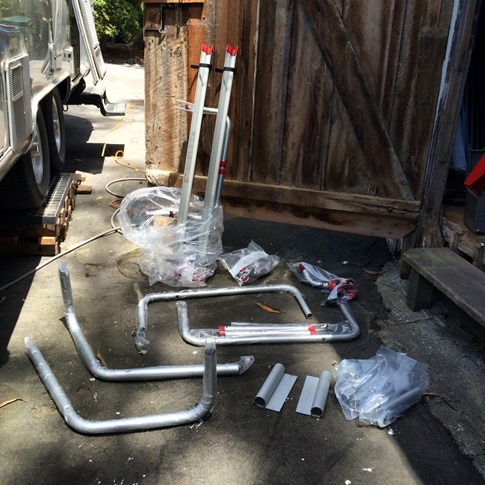
After pouring through the Airforum posts and learning of a YouTube video detailing the installation, I decided to undertake it myself. Man, I sure was hoping I could find a place for all these parts…
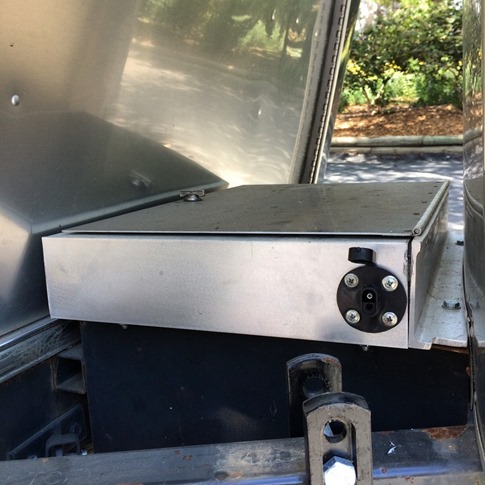
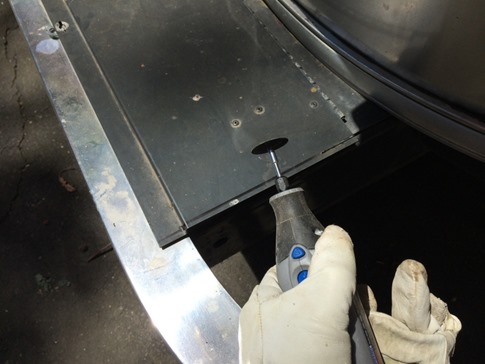
The first half of the installation, assembling the bike rack itself, went along pretty closely to the video. BTW, the instructions that came with the rack are basically useless other than to double check which bolt size they want you to use where. The challenges came when trying to fit the rack to the trailer. First, while dry fitting everything, it became clear that because the rear flip up bumper storage lid was mounted slightly offset, I would need to trim it to be able to clear the bike rack mounts. I have no idea if this will/would be a problem for anyone else, but the Dremel with a cutoff wheel handled the job.
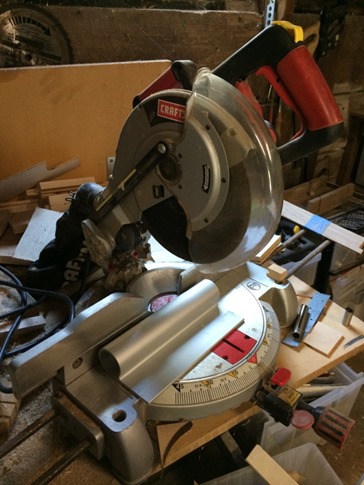
Next, unlike the pre-drilled and sized mounts shown in the video and the instructions, the ones that came with the rack were too big to fit into the space between the bumper and the back of the trailer and had no holes. Aluminum cuts pretty easily on the chop saw with a cutoff blade (as I had discovered while making my solar panel tilt bars and battery box extension) so I soon had them down to size.
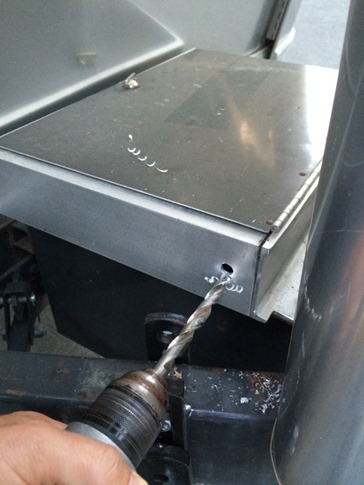
These “P-shaped” brackets basically just bolt onto the frame, but I did need to drill my own holes (in the bracket and frame). Unfortunately, my first set of holes turned out to be too low to accept the lower tube of the rack so I had to start over, shifting everything up with enough clearance between the tube and the chrome bumper. Then I realized that once I inserted the tube (which did have pre-drilled holes) into the bracket, I wouldn’t be able to see the holes and would be drilling blind. I took some good measurements and managed to hit them (roughly) when drilling through from the outside.
Attaching the upper brackets to the ribs was less nerve-wracking than I expected. The bracket had a little indentation to straddle the rivets, so it was clear where there holes should go. As suggested on the forums, I bought 4 #10 1” stainless screws which snugged the brackets down tight against the included rubber gaskets.
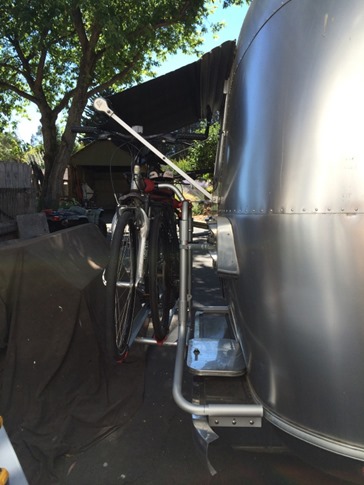
With a little trial and error, I was able to slide the wheel trays to the far left and right positions and tweak the clamps that grab the frames from the top in such a way as to allow the rear awning to deploy completely *and* the rear window to open. The bike frames are held securely millimeters apart from each other, although the handle bar grip of the inside bike does touch the rear wall of the trailer. Though the grip is just rubber, we may want to stick something between it and the aluminum skin. This could possibly have been avoided had I installed the rack tubes farther out in the mounting brackets, but I was pretty focused on keeping the load as close to the body of the trailer as possible. I’m happy with the results.
And with that, we really were nearing the end of the renovation. Sure there were a few odds and ends on the list, but even if the baby came now, we’d be able to tick them off before the 6 week Northwest loop we have in mind for early August.
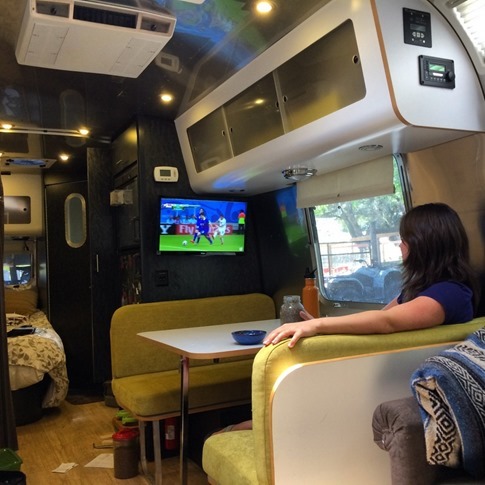
In fact, we’ve been doing a little “driveway camping” in the past weeks thanks to the convenient scheduling of World Cup games during Wynne’s nap time and the fact that we cancelled most of our cable and can only watch on Univision using the HD antenna in the trailer. Gotta tell ya, we both commented that it felt pretty darn indulgent to be sitting out there in our silver tiny house with the AC cranked watching the game with no kids.
Until the leak started… at first just a small drip coming from the interior shroud, then a few more, then a small stream flowing from above one of the foam air filters onto edge of the dinette and splashing onto the floor. We’d actually had a similar leak in a little earlier in the winter, but it had started after a solid day of rain, and today was so hot and clear we’d had to run the AC.
In a moment of weakness just before we left for the Casini Ranch Rally, I’d called the RV repair guy I’d used to to help with the wiring of the inverter to take a look. We’d scheduled an appointment for 9:30 am. I left at 8:45 to drive Wynne to school and by the time I was back at 9:15, there were already two guys on the roof of the trailer sliding the AC unit back onto a thick bed of something I think they called “GeoSeal” smeared all around the ceiling opening. Despite forum posts about perfectly compressed gaskets and not using silicone swirling around in my head, they assured me that this AC would never leak again, and I reluctantly let it go.
So when the leak started after a few hours of running the AC, I followed a few of the troubleshooting suggestions I found on the forum. My favorite was “the weed whacker trick” which involved using some plastic cable from a weed whacker in a cordless drill as makeshift drain snake. Actually, a straightened out hanger worked even better at dislodging a good amount of dirt and what may have been bug nests. The weird part, however, was that none of it was wet which it would have been the problem had been a clogged drain hose causing the drip pan to overflow.
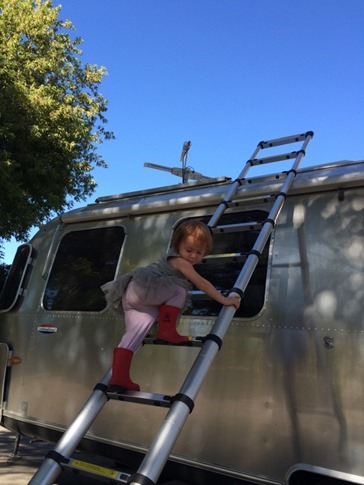
Climbing up the new telescoping ladder to investigate, I removed the exterior shroud and found a lot of water on the roof and standing puddles water in the AC unit. I located the drain holes in the drain pan, three along each side, and cleared some leaves and sloppily-applied sealant out of them, but not much water came out.
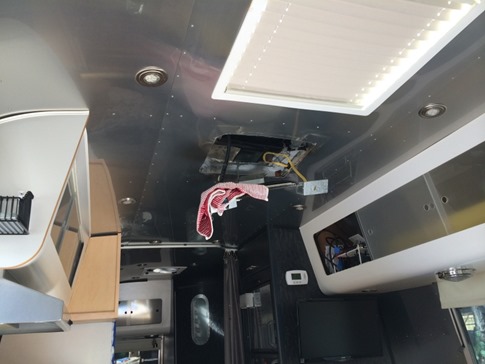
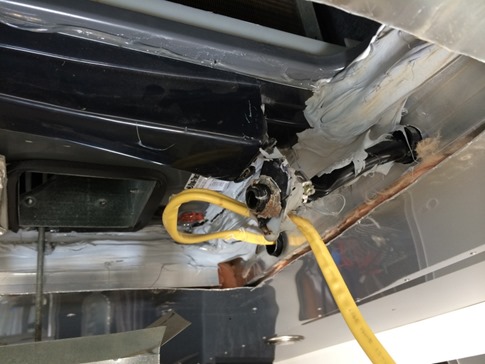
I went inside to investigate further, removing the inner plastic shroud of the AC and loosening the three (other people say they have four) long bolts through an internal metal bracket that secure the rooftop AC itself. What I saw was not pretty.
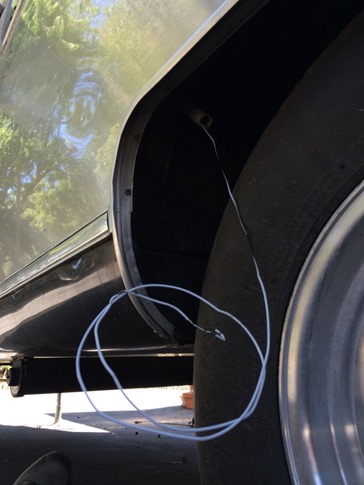
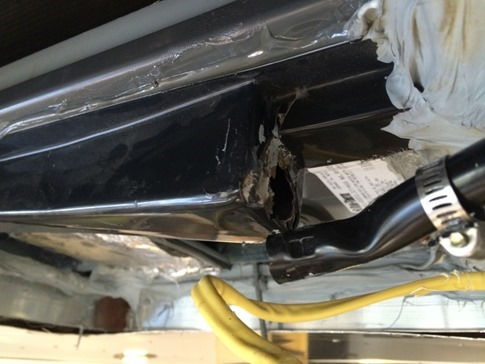
The black plastic channel that hangs below the drip pan to feed any water that gets past the outer shroud – or condenses off the AC during operation – into a hose routed between the inner and outer skins to drain in the front of the street side wheel well was cracked and had been repaired very poorly. It’s unclear whether the gray sealant around the edge of the drip pan is from the factory. I cleared as much goop as I could off the drip channel and removed any loose parts. With the drain hose detached, I blew compressed air through it from the inside with Ann sitting by the wheel well to confirm she felt the air. Again, if a clogged drain hose had been the problem, I would have expected any material that came out to have been wet.
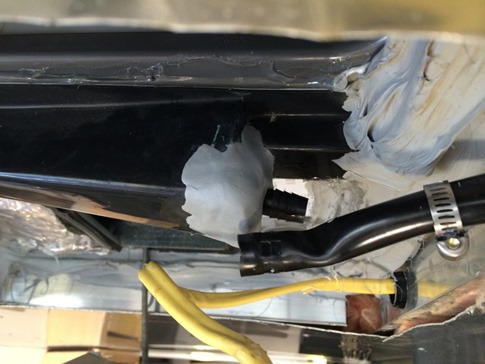
Using a two part putty approved for marine applications, I rolled out a “snake” (who knew playing with so much Play Doh lately would come in so handy?) and wrapped it around the barbed nipple. Holding the patch in place, I smeared the putty along the sides of the drip channel for a good seal that would harden (“to the strength of steel”) in minutes. A much cleaner repair.
After a couple hours of intensive “testing” (sitting in the trailer watching a World Cup match with the AC on full blast) there were no leaks. More importantly, there was a steady stream of water tinkling onto the front wheel on the street side. My feeling is that goop from the previous repair had clogged the drain channel causing condensation to overflow. I seemed daunting before I got things open, but I would encourage anyone with a dripping AC to take a look at their drip channel and make this quick fix if necessary.
With the baby’s due date rapidly approaching, I looked at the remaining items on my list: upholstery “buttons” to cover the pleating on the edge of the couch, a “sidesplash” to finish off the extended countertop area we’d created, a new dinette table and a few mechanical items like changing the wheel bearings and decided I could tick these off in the three weeks we’d have Ann’s mother visiting after the birth.
And with that, I’m calling it. Though I’m sure we’ll never really be “done,” we’ve brought this trailer a long way and are incredibly happy with how comfortable we feel in it. The next step will be to take some nice pictures and cross items off our modifications list.
In the meantime, I’ve stolen a little time from the project to get a couple more things ready, like this co-sleeper I built from MDF and finished with a vintage green milk paint…
… and starting to get really excited to meet the little being that’s going to inhabit it!

